Building a Survival Fire in Wet Conditions Without Wasting Heat or Patience
Wet-weather fire building gets treated like some special heroic branch of survival skill. I do not think that is quite right.
It is still basic firecraft. Just less forgiving.
Rain, soaked ground, damp wood, wind, cold hands, fading light, all of that punishes sloppy sequencing. The person who gets a fire going in wet conditions usually is not performing magic. They are just doing the ordinary parts more carefully than the frustrated person beside them.
That is the first thing worth understanding. Wet conditions make small mistakes expensive.
The Problem Usually Is Not Fire. It Is Moisture Management.
People say they cannot start a fire in the rain. Sometimes that is true in the short-term practical sense. More often they cannot start a fire because every stage of the build is leaking heat into moisture before the flame ever has a chance to grow.
The ground is wet. The first sticks are wet. The outer bark is wet. The tinder is half-damp. The fire lay is breathing badly. Then a person hits it harder with a lighter or throws bigger wood at it as if force will make the chemistry kinder.
Usually it does not.
A wet-weather fire starts with finding what is still dry enough to matter and protecting every bit of early heat you can.
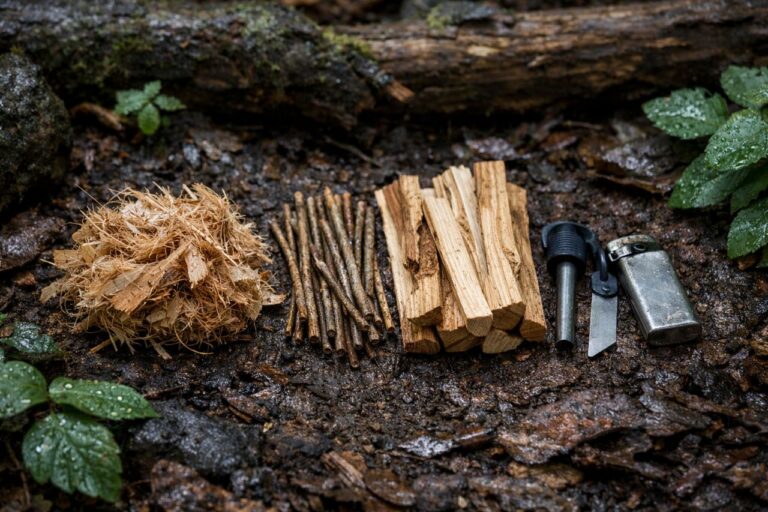
Dry Material Still Exists. You Just Have to Work for It.
This is where people either slow down and get serious or keep pretending the woods owe them easy fuel.
Dead wood lying openly on soaked ground is often a waste of time. Not always, but often enough. Better bets include dead standing wood, the underside of protected material, inner wood exposed by splitting, resin-rich sections, bark that shelters dry fibers, and the dry center of sticks that look useless from the outside.
I think this is why a knife matters so much in damp conditions. Not for drama. For access. A knife lets you split, shave, expose, and process material that still has dry life in it even when the surface looks defeated.
Outer wetness does not always tell the full story. That is one of the more useful things to learn early.
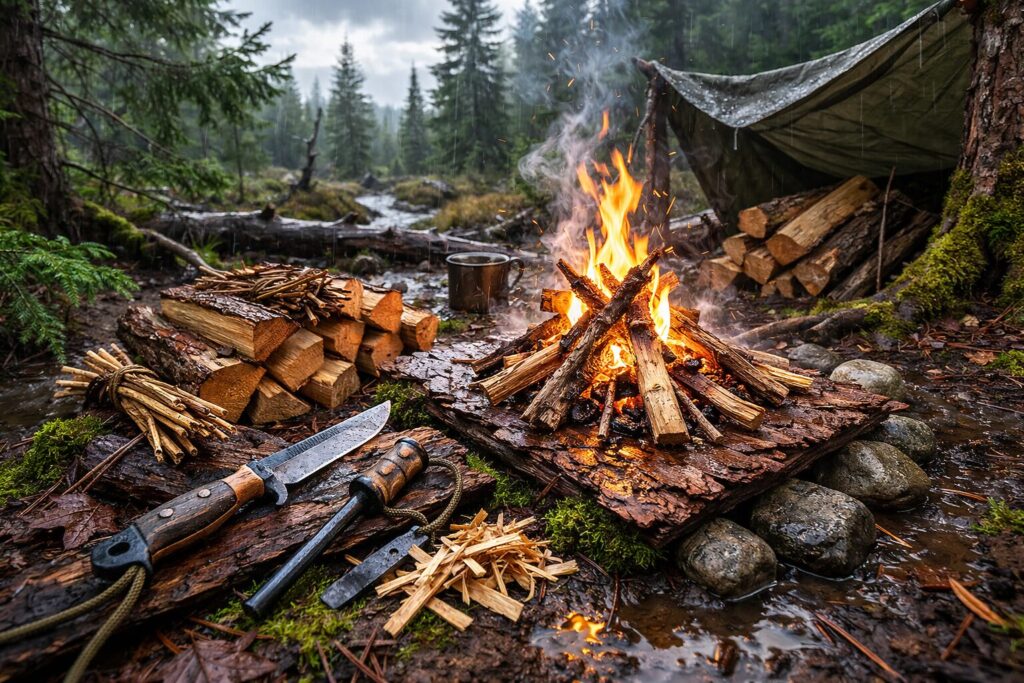
The Base Matters More Than Most People Think
If the first flame is sitting directly on wet soil, cold mud, or soaked leaf litter, you are already making the job harder. Tiny fires have no extra strength to spare. A lot of their early heat gets stolen downward.
So build a platform.
Split wood, bark slabs, dry sticks laid side by side, even a few flatter pieces of material that keep the ignition point lifted and drier than the ground underneath. It does not need to be elegant. It just needs to interrupt the wet surface that wants to eat your first success.
I have seen people blame their ferro rod for what was really a foundation problem. That happens more than it should.
Prepare Much More Small Material Than Feels Necessary
In dry weather you can sometimes get away with being a little lazy. In wet weather, not really.
You need serious tinder. Not a symbolic little pinch. Then very small kindling. Then slightly larger kindling. Then more. Wet conditions punish gaps in the size ladder. If the fire cannot step upward smoothly, it stalls and falls back into smoke, hiss, and annoyance.
This is one reason people get discouraged. They gather enough for one hopeful attempt and then burn through it before the fire has any stability. Now they are colder, more rushed, and working with less patience than they had ten minutes earlier.
A better way is to overprepare at the small end. Gather, split, shave, sort, then do a little more than you think you need. That extra pile often ends up being the difference between a working fire and a lesson in irritation.
A Real Example
Picture a soaked late afternoon after off-and-on mountain rain. A hiker is not lost exactly, but progress has slowed, clothing is damp, and the air is sliding toward the kind of cold that starts turning inconvenience into a real problem.
The first instinct is often to rush. Light something quickly. Get flame now. But now is not always the most useful priority. Useful priority is finding dry enough inner wood, building a base, and making sure the first tiny success has somewhere to go.
So instead of lunging at the first pile of sticks, the hiker finds dead standing branches, splits them, shaves dry curls, builds a bark-and-stick platform, and assembles material by size before even striking a spark. The actual ignition might still take a minute or two. But when the flame appears, it has a path forward.
That is the whole game. Not just flame, but path.
Protect the First Flame Like It Is Fragile, Because It Is
When tinder catches in wet conditions, people get overeager. They want the fire to become grown immediately.
It will not.
Add the thinnest material first. Then slightly larger. Shield the flame from direct rain or wind with your body, pack, or position if needed. Keep airflow alive. Resist the temptation to toss on finger-thick sticks just because you want to feel finished.
A young fire in damp conditions is touchy. It wants delicacy for a few minutes. That is not weakness. It is just where the heat balance still is.
If smoke builds and the flame shrinks, something is off. Usually fuel size, moisture, or airflow. That is feedback, not bad luck.
Tools Help, But They Do Not Replace Judgment
I would absolutely rather have a lighter, waterproof matches, a ferro rod, a knife, and some backup tinder than go without them. No question.
But wet-weather success still depends more on how the materials are handled than on how rugged the gear sounds when listed out loud. A ferro rod into poor tinder is still poor firecraft. A strong lighter held under damp chunks of wood is still not a plan.
Carry good tools. Fine. Just do not let the tool list trick you into thinking the work underneath it became optional.
The Usual Wet-Weather Mistakes
- Trying to burn wood straight off the soaked ground.
- Skipping wood splitting and relying on wet outer surfaces.
- Using too little tinder.
- Jumping from fragile flame to oversized fuel too quickly.
- Building directly on wet soil.
- Letting rain or wind hit the ignition point unchecked.
Those mistakes do not look very dramatic written down. In the field they are enough.
What Practice Should Actually Look Like
If someone wants to get better at this, I would not have them read about rain forever. I would have them practice on damp days with safe margins and enough time to notice what really matters.
Split wood and compare the dry center with the wet surface. Build a dry base on soggy ground. Practice making larger tinder bundles than pride wants to admit are necessary. Use a lighter one day, ferro rod another day, and notice how much more disciplined the spark-based route forces you to be.
That kind of practice builds realism. And realism is usually what keeps wet-weather fire from turning into a confidence problem.
What This Skill Really Gives You
A working fire in wet conditions gives warmth, drying, hot water, better morale, and sometimes a badly needed interruption in a downhill slide. More than that, it proves that conditions do not have to be friendly for order to work.
You still have to respect the conditions. Obviously. But if a person can manage moisture, sequence fuel correctly, protect early heat, and stay patient when the first attempt sputters, wet weather stops feeling mystical. It just feels demanding.
That is a better frame for the skill anyway.
Not luck. Not heroics. Just damp conditions asking for cleaner work.