Emergency Signaling Methods That Help Rescuers Find You Faster
Being in trouble and being findable are two different problems.
You may know exactly what happened. You may know that you need help. Rescuers still need a reason to start looking, a useful search area, and a signal they can recognize from the ground or air. If any one of those pieces is missing, a manageable emergency can become a long wait.
I use a simple rule for signaling: do not depend on one device, one battery, one person, or one moment of luck.
A strong emergency signaling plan uses layers. One alerts someone that you are overdue. Another sends distress. Another makes you visible or audible when rescuers enter the area. The system has to work when you are cold, tired, injured, or unable to move far.
Start the Rescue Before You Need the Signal
The best signaling tool may be the information you leave behind before the trip begins.
Tell a reliable person where you are going, the route you expect to use, who is with you, what vehicle you are driving, and when you should be back. Give that person a specific action instead of saying, “Do not worry unless I am really late.”
A useful overdue instruction sounds like this:
> If I have not contacted you by 8:00 p.m., call the local emergency authority and provide this route, vehicle description, group information, and equipment list.
That creates a trigger. Without it, people often spend hours wondering whether they are overreacting.
This same discipline belongs in a household family emergency plan. Everyone should know who reports an overdue traveler, where route information is kept, and which authority covers the destination area.
An itinerary narrows the search so every later signal has a better chance of being noticed.
Use Repeated Signals That Look Intentional
Random noise and light are easy to dismiss. Repetition shows intention.
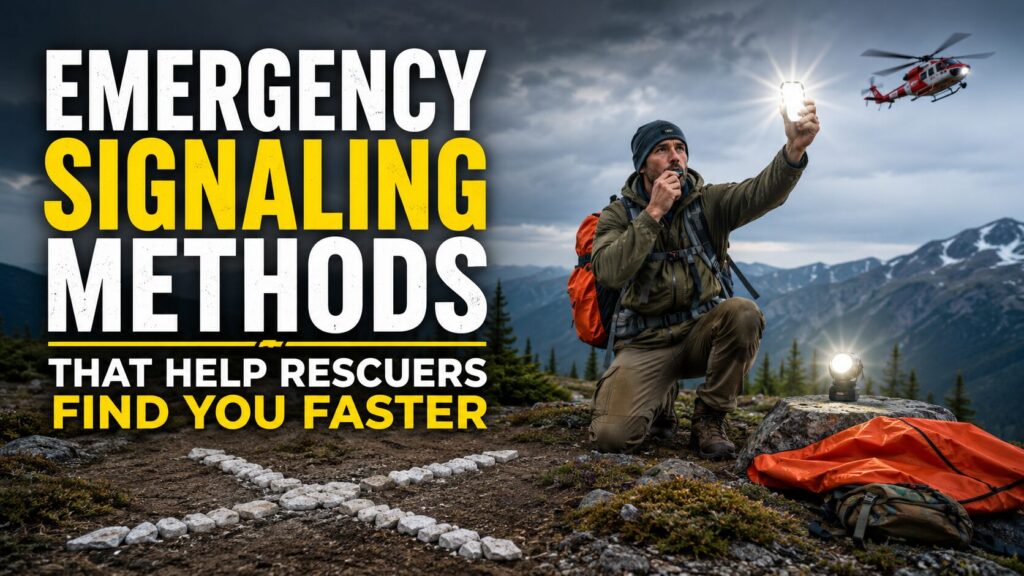
A common distress pattern is a signal repeated three times, followed by a pause, then repeated again. That may be three whistle blasts, three flashes, three shouts, or three clearly separated movements. The pattern matters because it does not sound or look like ordinary activity.
For a flashlight, the SOS pattern is three short flashes, three long flashes, and three short flashes. Pause and repeat it. Do not wave the light continuously until the battery is exhausted. A deliberate pattern is easier to recognize and easier to sustain.
For any emergency signal, make it distinct, repeat it, pause to listen or look for a response, and repeat it again.
If you hear a possible response, answer with the same clear pattern. Rescue crews may use sound to work toward your position when terrain, trees, darkness, or weather prevents direct visibility.
A Whistle Should Be on Your Body
A whistle is one of the simplest signaling tools because it is small, inexpensive, and does not depend on batteries or cellular coverage.
It also uses much less energy than shouting. A person who can only yell for a few minutes may be able to use a whistle at intervals for hours.
Carry it where you can reach it after a fall. A whistle buried in a backpack is not useful if the pack is lost down a slope or you cannot move your injured arm. Clip it to a jacket, shoulder strap, life vest, or other location you can reach with either hand.
Use three strong blasts, pause, listen, and repeat. In wind, near moving water, or inside dense forest, change your direction between sets so the sound travels into different areas.
A whistle works best at close range, after rescuers or other people are already in the area. Pair it with a method that starts the search from farther away.
Light, Mirrors, and Contrast Make You Visible
Visual signals work when there is a line of sight.
A signal mirror can send a bright flash toward aircraft, boats, vehicles, or distant people. The goal is not to blind anyone or sweep the sky continuously. Use the aiming feature if the mirror has one, or hold the mirror near your face and work the reflected light toward the target.
A flashlight or headlamp can signal after dark, from a window, across water, or through openings in trees. Use a repeated pattern rather than leaving it on continuously. Preserve the battery for movement, shelter tasks, and later signaling.
Bright fabric, an emergency blanket, a reflective vest, or a contrasting tarp can create a large visible target. Put the brightest material where it contrasts with the background. Orange may stand out in green forest. Dark material may show against snow. A reflective blanket may be useful in open terrain, but secure it so wind does not carry it away.
Concentrate color and movement in one obvious location near you.
A well-built survival gear kit should include at least one audible signal and one visual signal, not just tools for shelter, fire, and water.
Build Ground Signals Large Enough to Matter
Ground signals can help aircraft or distant searchers identify your location when you are unable to communicate directly.
Use rocks, logs, branches, clothing, snow trenches, or disturbed ground to create a large symbol or directional marker. Small letters that look clear nearby may disappear completely from the air.
Use straight lines, strong contrast, and open ground when possible. Avoid building a signal under a tree canopy where it cannot be seen. If you move to a nearby opening to signal, leave a clear marker showing where you went and keep your essential gear with you.
Fire and smoke can attract attention, but they also create serious risk. Do not start a fire where conditions could spread it into vegetation, structures, dry grass, or forest. A signal that starts a wildfire makes the emergency worse. Use fire only when it is safe, legal, controllable, and necessary.
Electronic Signals Start the Long-Range Response
Phones, satellite messengers, radios, and emergency beacons can move the first alert beyond your immediate area.
If a phone call or text can reach emergency services, use it. Give your location, the emergency, people involved, injuries, weather, shelter, and whether you will stay or move. Send coordinates and describe nearby landmarks.
A text may go through when a voice call does not, but do not assume it was received. Preserve power, reduce screen use, and keep the phone warm in cold weather.
Satellite messengers can provide SOS activation and, depending on the device and service, two-way messages. They still depend on power, a usable view of the sky, an active service where required, and a user who knows how to operate them.
A registered 406 MHz personal locator beacon is a dedicated distress tool. When activated in a genuine emergency, it sends an alert through the satellite search-and-rescue system. Registration matters because it connects the beacon identifier to useful emergency contacts and trip information.
Learn the controls before an emergency. Practice only through the manufacturer-approved test procedure. Never activate a live distress signal for casual practice.
Your broader emergency communication plan should explain which device is primary, which is backup, and what household members should do when no message arrives.
Stay Put When Moving Would Break the Search
Once your location is known, unnecessary movement can make you harder to find.
Stay put when the location is reasonably safe, rescuers have your coordinates or route, and moving would increase injury, exposure, or confusion. Improve shelter, make yourself visible, conserve batteries, and signal at intervals.
Move when remaining creates a greater immediate danger, such as rising water, fire, unstable terrain, severe exposure, or another threat you cannot control. If you must move, communicate the change when possible. Leave a visible note or marker with the time, direction, destination, and reason for moving.
Do not wander because waiting feels unproductive. Moving without a clear route can leave the expected search area and weaken the original itinerary.
The purpose of an emergency contact system is not only to exchange messages. It also creates a shared expectation about when to report trouble and what information to pass forward.
Use a Signaling Schedule
Continuous signaling wastes energy and batteries; signaling once may be missed.
Use a simple schedule unless you can see or hear rescuers nearby. For example:
- Listen and look for several minutes.
- Give three whistle blasts.
- Scan with a mirror if aircraft or distant people are visible.
- Send a light pattern after dark.
- Check the communication device at planned intervals.
- Repeat after a reasonable pause.
When an aircraft, boat, vehicle, or search team enters the area, increase the signal. Move bright material, use the mirror, flash the light, and blow the whistle. Stop long enough to determine whether they have seen or heard you.
Signaling is a feedback process. Send a clear signal, watch for a response, adjust direction or method, and send again.
Key Takeaways
- A rescue begins faster when someone has your route, return time, and overdue instructions.
- Repeated signals are easier to recognize as intentional distress.
- Carry a whistle on your body, not only inside your pack.
- Pair audible signals with visual methods such as a mirror, light, or bright material.
- Make ground signals large, simple, and visible from above.
- Electronic tools need power, correct setup, and practice before the emergency.
- A registered personal locator beacon can alert the satellite search-and-rescue system.
- Once rescuers have your location, unnecessary movement may make the search harder.
- Use several signaling layers rather than trusting one device.
Step-by-Step Actions
- Choose a reliable emergency contact and give that person a specific overdue time and reporting instruction.
- Write down your route, destination, vehicle description, group details, and expected return time before each remote trip.
- Attach a whistle where you can reach it without opening your backpack.
- Add a signal mirror, flashlight or headlamp, bright material, and spare power to your kit.
- Learn and practice the three-signal distress pattern and the flashlight SOS pattern without activating any live emergency beacon.
- Register every 406 MHz emergency beacon and keep the registration information current.
- Learn the approved test procedure and activation steps for every electronic signaling device you carry.
- Decide in advance when you will stay put, when you must move for immediate safety, and how you will mark a necessary change of location.
Checklist
- Reliable emergency contact selected: Yes / No
- Route and return time shared before departure: Yes / No
- Specific overdue reporting time established: Yes / No
- Whistle attached where it is immediately reachable: Yes / No
- Signal mirror packed: Yes / No
- Flashlight or headlamp packed with usable power: Yes / No
- Bright signaling material packed: Yes / No
- Three-signal distress pattern understood: Yes / No
- Electronic signaling device tested through approved procedure: Yes / No
- 406 MHz beacon registration current, if carried: Yes / No
- Stay-put and emergency-movement rules understood: Yes / No