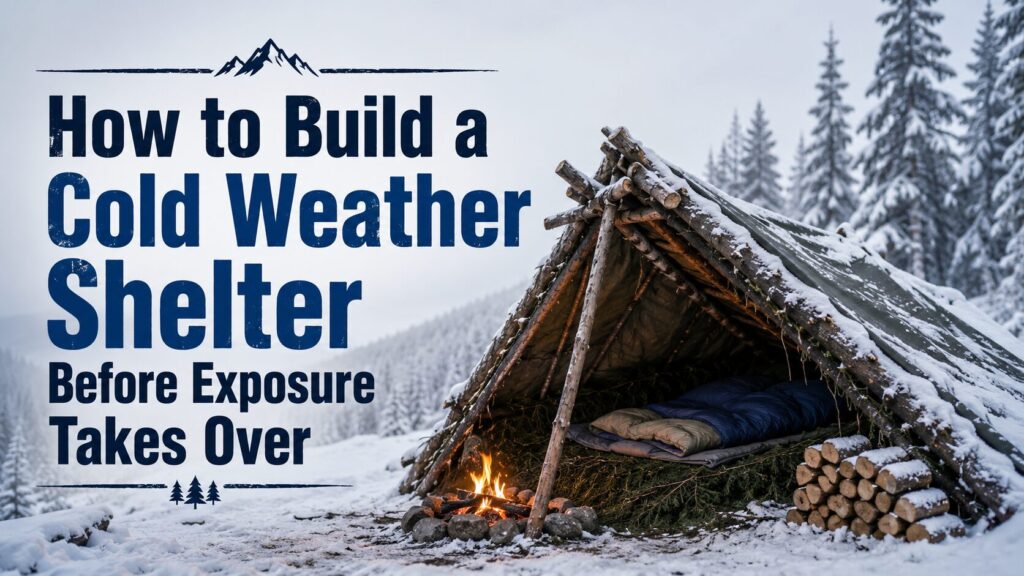
How to Build a Cold Weather Shelter Before Exposure Takes Over
Cold weather shelter is not mainly about making a roof. It is about slowing heat loss before cold, wind, wet clothing, and exhaustion begin working together.
Rain, melting snow, sweat, wind, and frozen ground can pull heat away faster than expected. The mistake is waiting until violent shivering or clumsy hands make the danger obvious. By then, every small job takes longer.
I treat shelter as an early decision, not a last desperate project. If weather is worsening or daylight is fading, ask, “Will I still be able to build protection an hour from now?”
Stop the Four Main Paths of Heat Loss
A good cold weather shelter has four jobs:
- block moving air
- keep precipitation off you
- separate your body from the ground
- hold a small pocket of warmer air around you
People focus on walls and roof because those parts look like shelter. Ground insulation is easier to ignore. Snow, frozen soil, rock, and damp leaves can drain warmth all night. A thick bed of dry boughs, leaves, grass, spare clothing, foam, or other material may matter as much as the structure above it.
The shelter should also be only as large as necessary. A huge interior feels comfortable while you are building it, but your body has to warm all that air. A smaller sleeping space is usually easier to protect from wind and easier to improve with the materials you have.
This is the same basic priority behind choosing emergency shelters when conditions start working against you: control exposure first, then improve comfort.
Choose the Site Before You Start Building
A fast shelter in a dangerous location is still a bad shelter.
Look up before looking down. Avoid dead branches, leaning trees, heavy snow hanging above you, loose rock, and anything that could fall during wind. Stay away from the bottom of gullies or dry channels where water, slush, or cold air can collect. Do not build where drifting snow could bury the entrance or where a slope could slide.
Wind direction matters. Use terrain, thick trees, a large rock, or another solid feature as a windbreak, but do not crowd unstable trees or cliff faces. Face the smallest opening away from the prevailing wind when possible.
You also need nearby building material. Walking back and forth for every armful of boughs wastes heat and time. A slightly less perfect site with good material close by may be safer than a beautiful spot that requires a long supply route.
Before settling, ask three questions:
- What can fall, slide, flood, or drift onto this location?
- Where is the wind coming from, and could it shift?
- Can I gather enough dry insulation and structural material without exhausting myself?
That quick check prevents a lot of bad decisions.
Build Before Your Hands Become Useless
Picture two people who stop late in the day after wet snow has begun. They still feel capable, so they spend twenty minutes debating whether to continue. Then they search for the ideal site. Then one person starts cutting long poles for a complicated structure while the other tries to start a fire with numb fingers.
Nothing is technically impossible yet. It is just getting slower.
A better sequence is blunt: get out of the wind, lay down insulation, make the smallest workable cover, change or protect wet layers, and then improve the shelter. Complexity comes later. The first version only needs to reduce heat loss enough to buy time.
A simple lean-to can work with a windbreak and a safely placed exterior fire, but an open front loses heat quickly. A debris shelter or low enclosed structure holds warmth better if it has ventilation and stays clear of flame. Snow structures may help in deep snow, but they can collapse and vents can drift shut. Use the simplest design you understand and can finish.
Do not experiment with an unfamiliar, elaborate shelter while cold and fading. That is not the time.
Insulation Is Usually the Real Work
The frame often goes up quickly. Insulation takes the time.
For a debris shelter, pile dry material much thicker than seems necessary. Loose leaves and boughs settle. Wind moves them. Snow compresses them. Thin coverage looks finished but performs poorly.
Start with the ground bed. Make it long enough that your head, hips, and feet remain insulated. If you can feel hard ground through the bedding while kneeling, add more. Then build the roof and sides, filling gaps that allow wind to move through.
Keep wet material away from the layer touching your clothing. The inner sleeping area should be as dry as you can make it.
Your clothing is part of the shelter system too. Loosen anything that restricts circulation. Remove or isolate wet layers if you have dry replacements. Cover your head and neck. Do not crawl into insulation while wearing snow-covered clothing and then let it melt around you.
A basic kit makes this much easier. A tarp, cordage, foam pad, emergency bivy, contractor bags, and a compact cutting tool can turn an hour of gathering into a much shorter job. That is why a basic survival kit should cover more than the obvious gear.
Fire Helps, but It Does Not Replace Shelter
Fire is useful for warmth, drying, light, morale, and signaling. It is not a substitute for wind protection and ground insulation.
An exposed fire can consume a lot of fuel while warming only the side facing it. Wind carries heat away, wet wood demands work, and someone must keep feeding it. If the fire fails at 2 a.m., the weakness of the plan shows up at once.
Build the shelter so it still provides meaningful protection without a perfect fire.
Keep flames and hot coals outside improvised enclosed shelters. Never use a fuel-burning stove, charcoal, or an open fire inside a poorly ventilated space. Carbon monoxide gives no useful warning before it incapacitates people. Snow shelters, tents, vehicles, and tight debris structures need ventilation, and vents must remain clear as snow falls or drifts.
If you use an exterior fire, clear the area, control sparks, and position it where heat can reach the shelter without igniting the roof, bedding, or nearby trees. Prepare more fuel than you think one cold night will require. The principles in fire starting basics for bad conditions matter most when fine tinder, dry kindling, and protected ignition are prepared before the cold becomes severe.
Ventilation and Moisture Can Quietly Ruin the Shelter
A shelter can block wind so well that moisture becomes the next problem. Breathing, wet clothing, and cooking add water vapor. In a tight space, condensation can drip onto bedding. In snow structures, poor ventilation adds another danger.
Leave a deliberate ventilation opening. Check it during the night. If snow is falling, assume that a small opening can become blocked. Keep a tool nearby so you can clear an exit or vent from inside.
Avoid breathing deep inside your sleeping insulation. Pulling your entire face under a blanket or sleeping bag may feel warmer briefly, but the moisture from your breath reduces insulation over time. Keep your mouth and nose exposed while protecting the rest of your head and neck.
Dry is not a luxury in cold conditions. Dry is stored heat.
Signals Most People Ignore
Cold trouble usually appears as a pattern, not one dramatic moment.
Watch for:
- constant shivering that suddenly becomes weaker
- repeated fumbling with simple gear
- slurred or unusually slow speech
- poor decisions that do not match the situation
- someone becoming quiet, confused, or difficult to motivate
- stumbling or sitting down repeatedly
- wet clothing being dismissed as “not that bad”
- a person insisting they are fine while their coordination is getting worse
- shelter work becoming disorganized for no clear reason
Those signs should change the plan. Stop travel. Get the person protected from wind and wet. Replace wet layers when possible, insulate them from the ground, and begin gentle warming. Severe confusion, loss of coordination, drowsiness, or worsening condition requires emergency help.
Do not rub cold limbs or apply extreme direct heat. Stop further heat loss and get professional medical help.
Improve the Shelter in the Right Order
Once the first protective shell is working, improvements should follow a useful order:
- Add more ground insulation.
- Close wind gaps.
- Strengthen the roof against expected snow or wind.
- Improve the entrance while preserving ventilation.
- Organize dry clothing, water, lighting, and emergency gear.
- Establish a safe fire and fuel routine if conditions allow.
- Mark the shelter so rescuers or separated group members can find it.
Do not spend an hour making the doorway neat while someone lies on a thin bed over frozen ground. Fix the largest heat-loss problem first.
A cold weather shelter is never finished in the decorative sense. It is finished when it protects the people inside well enough for the conditions, and when improving it further would cost more energy than it saves.
Key Takeaways
Cold weather shelter is heat-loss control: block wind, stay dry, insulate from the ground, and keep the protected space small.
Build earlier than feels necessary. Cold hands, fading light, wet clothing, and exhaustion turn simple work into slow work.
Site hazards, ventilation, and fire safety matter as much as the walls. A warm shelter in a dangerous location is not a safe shelter.
Ground insulation deserves priority. If you can feel the cold surface through your bedding, add more.
Watch behavior and coordination for early signs of hypothermia. Confusion and clumsiness are not minor inconveniences.
Step-by-Step Actions
- Stop early enough to build while you still have coordination, daylight, and useful energy.
- Check above, below, and around the site for falling limbs, slides, flooding, drifting snow, and wind exposure.
- Put down a thick insulating bed before spending time on comfort or appearance.
- Build the smallest shelter that safely fits the people who need protection.
- Block wind and precipitation, then add much more insulation than a thin finished-looking layer.
- Change, isolate, or cover wet clothing and protect the head and neck.
- Maintain ventilation and keep all fuel-burning devices and open flame out of enclosed improvised shelters.
- Recheck the shelter, vents, occupants, weather, and fire conditions throughout the night.
Checklist
- Site clear of falling, sliding, flooding, and drifting hazards
- Entrance positioned away from prevailing wind when practical
- Thick ground insulation under the entire body
- Roof and walls protected against wind and precipitation
- Interior small enough to retain warmth
- Wet clothing removed, isolated, or covered
- Head and neck protected
- Ventilation opening established and checked
- Fire placed safely outside the enclosed shelter
- Extra fuel gathered before darkness or deeper cold
- Water and essential gear kept accessible
- Hypothermia warning signs reviewed with the group
- Shelter marked or made visible for rescuers
- Emergency communication plan ready