Introduction:
In a survival situation, shelter is one of the most critical priorities—often even more important than food or water in extreme conditions. Exposure to harsh weather can lead to hypothermia or heatstroke within hours. This guide will teach you how to build effective survival shelters using natural materials and minimal gear. We’ll cover real-life survival scenarios, expert insights, step-by-step instructions, common mistakes to avoid, and pro tips for staying safe in the wild.
1. Why a Shelter is Essential for Survival
A well-built shelter provides:
- Protection from extreme temperatures (heat, cold, wind, and rain).
- Safety from wildlife and insects.
- Insulation and comfort for a better night’s sleep.
- A psychological boost, reducing stress and increasing your chances of survival.
Real-Life Example: In 1998, a lost hiker in the Canadian Rockies built a simple lean-to shelter using branches and leaves. This insulated him from freezing temperatures until rescuers arrived days later. His quick thinking saved his life.
2. The Best Survival Shelters for Different Environments
Choosing the right shelter depends on your surroundings. Here are the most effective types:
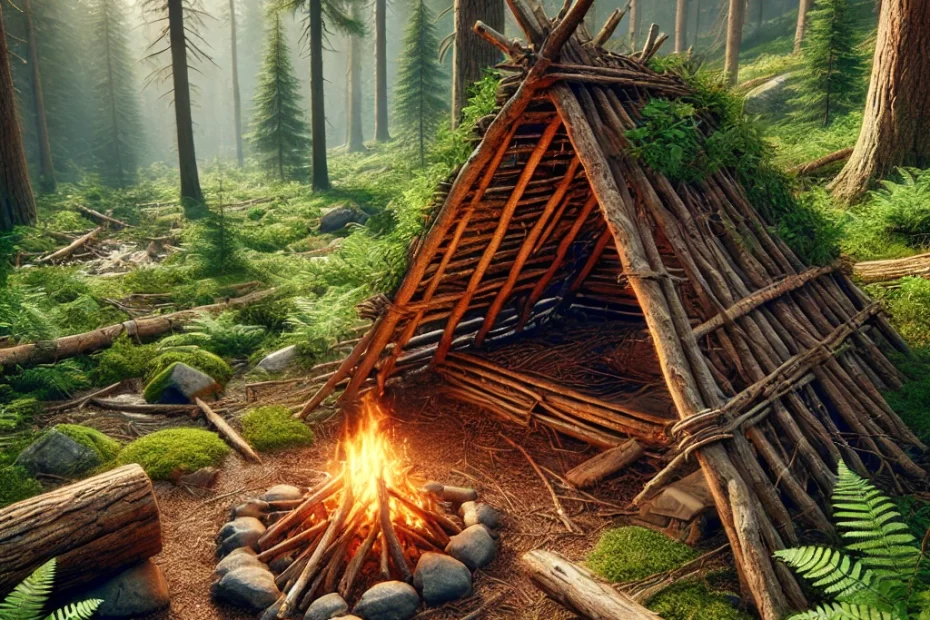
A-Frame Shelter (Best for Cold Climates)
- How it Works: A simple triangular structure built with a central ridge pole and leaning branches.
- Best Materials: Logs, branches, leaves, and pine needles for insulation.
- Pros: Great for retaining heat and keeping wind out.
- Cons: Requires a lot of materials and time to build.
Lean-To Shelter (Quick & Easy)
- How it Works: A single wall angled against a support structure, such as a fallen tree.
- Best Materials: Large branches, a tarp, or survival blankets.
- Pros: Fast to construct and offers good wind protection.
- Cons: Less protection from rain and extreme cold.
Debris Hut (For Maximum Insulation)
- How it Works: A small, enclosed shelter covered in thick layers of leaves and debris for insulation.
- Best Materials: Dry leaves, pine needles, and branches.
- Pros: Excellent heat retention.
- Cons: Time-consuming to build.
Snow Cave (For Arctic Conditions)
- How it Works: A hollowed-out area in a snowbank with a small entrance and a dome-shaped ceiling.
- Best Materials: Packed snow.
- Pros: Naturally insulated against extreme cold.
- Cons: Risk of collapse if not built properly.
3. Step-by-Step Guide to Building a Lean-To Shelter
- Find a Suitable Location:
- Choose an area protected from wind and rain.
- Avoid low-lying areas prone to flooding.
- Gather Materials:
- Use a sturdy ridge pole (a large branch or fallen tree).
- Collect long sticks for the framework.
- Gather leaves, grass, or debris for insulation.
- Build the Frame:
- Lean sticks against the ridge pole at a 45-degree angle.
- Cover the frame with smaller branches and leaves to trap heat.
- Insulate the Shelter:
- Add a thick layer of leaves, grass, or bark for insulation.
- If available, place a tarp or survival blanket over the structure.
- Check for Stability:
- Test the frame by gently pushing to ensure it won’t collapse.
4. Common Mistakes to Avoid
- Mistake #1: Building in the Wrong Location
- Solution: Avoid areas near rivers or under dead trees (falling branches are a hazard).
- Mistake #2: Not Insulating Properly
- Solution: Pile on extra layers of debris to keep warm, especially in cold conditions.
- Mistake #3: Making the Shelter Too Big
- Solution: Keep it just big enough to fit your body—smaller spaces retain heat better.
- Mistake #4: Facing the Shelter into the Wind
- Solution: Position the entrance away from prevailing winds.
5. Pro Tips & Survival Hacks for Shelter Building
- Use Mylar Blankets: Line the inside of your shelter with a Mylar blanket to reflect body heat.
- Elevate Your Sleeping Area: Place leaves, branches, or a tarp under you to prevent heat loss to the ground.
- Camouflage for Safety: If you need to stay hidden, cover your shelter with natural debris to blend in.
- Use a Fire Reflector: Build a fire in front of your shelter with a reflector wall (stones or logs) to direct heat inside.
6. Final Thoughts
Knowing how to build a proper survival shelter can save your life in extreme conditions. Whether you’re deep in the wilderness or stranded unexpectedly, these techniques give you the best chance of staying safe and warm.
Have you ever built a survival shelter? Share your experiences in the comments below!